Nerf Gun Robot
|
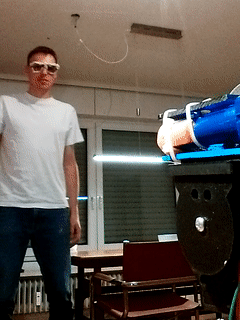
This is a robot that shoots a Nerf gun in your face. Code is available at Github. I got the idea because my colleagues played around with Nerf guns at the office.
Hardware
Two servos are used for panning and tilting the Nerf gun and a Raspberry Pi camera. The gun is modified slightly so that a third (micro) servo can pull the trigger. A Raspberry Pi 4 processes the images and controls the servos using a servo controller board.
|
|
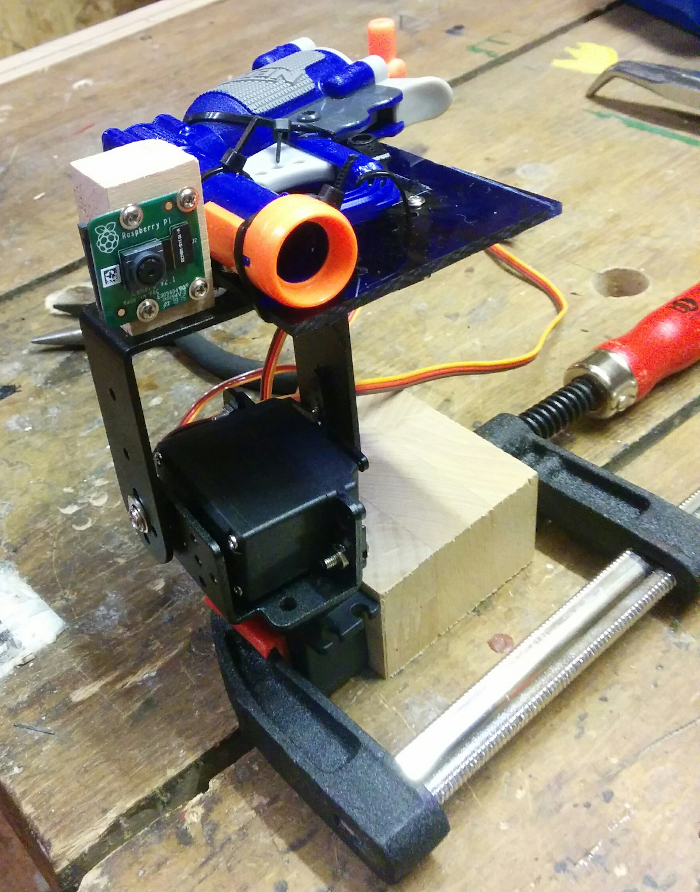
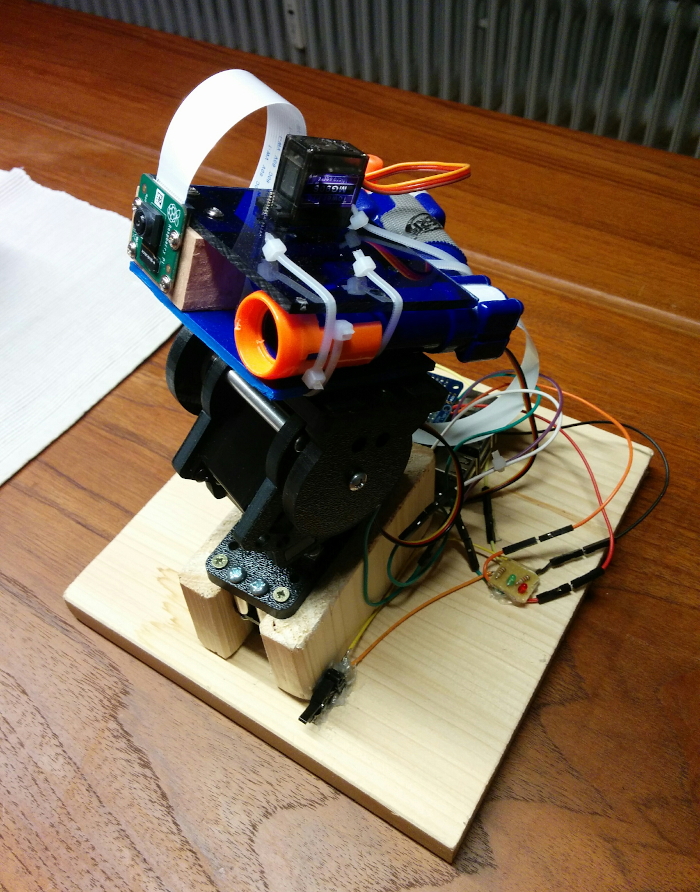
| Version 1 | (Final) Version 3 |
I built three versions:
- The first setup used cheap servos and servo connectors. The servos controlled badly and shaked a lot. The cheap servo connectors were very loose and the servo axes carried the whole weight of the moving head. The center of mass was very high, which further reduced the stability.
- The second version used the same hardware but the center of mass was much lower. Still the servos shaked a lot and failed to follow a linear motion.
- The third version used higher quality digital servos with greater resolution which eliminated servo shaking and improved aiming accuracy. Also the weight of the head is now decoupled from the servos and is carried by a bearing. All together the motions of the head are much smoother and the accuracy increased significantly compared to the first version.
Face Detection & Tracking
As camera driver, I reused an existing open-source ROS node for the Raspberry Pi camera.
I use the OpenCV face detection based on Haar cascades. I also tried the HOG-SVM based detector of dlib which produces less false-positives. However it takes around 6 s to process an image on Raspberry Pi. One reason for this is that no AVX SIMD instructions are available on ARM. I hacked in NEON SIMD instructions into the library for applying the filter kernels on the matrix. This results in a speed-up of around 2 which is remarkable but not sufficient for realtime detection.
The OpenCV face detection runs pretty fast even on the Raspberry Pi. To further increase the control frequency, I use the OpenCV KCF tracker to track the face after detecting. When the track is lost, the system switches back to detection. Tracking is much faster than detecting and makes it possible to control smoothly with 40 Hz.
|
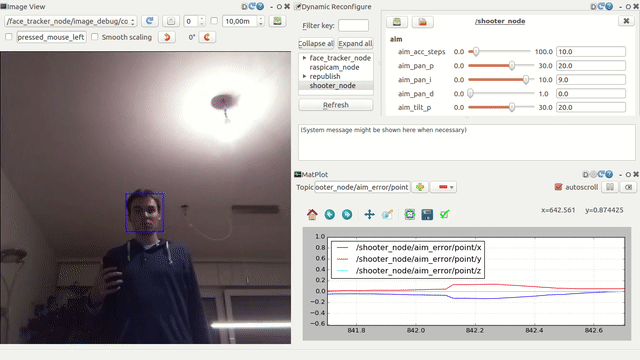
| RQT visualization of face tracking and control |
Control
For controlling the servos, I use a PI controller. The error for pan and tilt is equal to the X and Y distance of the detection center to the image center respectively. For better controlling, I opened up the servos to access the internal potentiometer values (see the following image). I run a simple calibration routine to estimate parameters for a mapping function, so that I can calculate the rotation value from the potentiometer voltage levels. The current rotation values of the servos are then used to make the control more robust while rotating. As soon as the control errors are small enough, the third servo pulls the trigger.

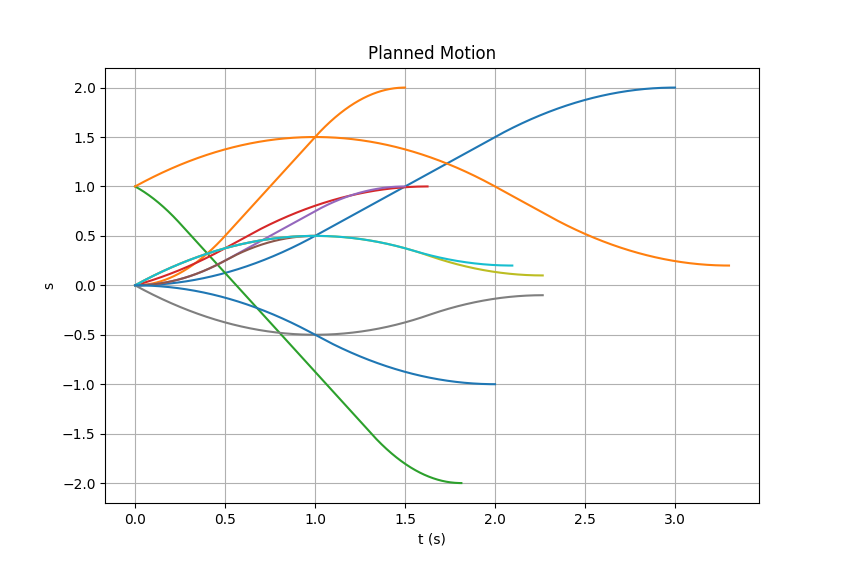
Motion Planning
For planning open-loop motions as used for the calibration routine and for parking the head (returning to forward-looking orientation), I implemented a simple motion planning using splines. Motions consist of an constant-acceleration phase, a constant-velocity phase and a constant-breaking phase. The velocity stays continuous at the phase transitions to produce very smooth motions. Durations of the phases have to be calculated so that the conditions hold and the motion ends at the desired target position. Originally I wanted to use the motion planning for aiming too but the control-only solution works good enough. Therefore the library also supports starting with non-zero velocity and can handle cases of overshooting the target value because fast enough breaking is not possible anymore (see e. g. the gray function in the following image). Also cases have to be handled in which no constant-velocity phase can exist and the acceleration phase ends before reaching the max. velocity because the target position lies very close to the start position (see e. g. the blue function ending at t = 2 s in the following image). Here are some examples of planned motions with different constellations of the parameters: start position, target position, start velocity, end velocity, max. velocity and (negative) acceleration.